
welt pocket tutorial
Welt pockets offer a refined, professional finish to garments, elevating designs with a sleek, minimalist aesthetic․ This tutorial explores techniques for crafting these stylish pockets․
Mastering welt pockets unlocks a higher level of sewing skill, allowing for customization and a polished look in various apparel projects, from trousers to jackets․
What is a Welt Pocket?
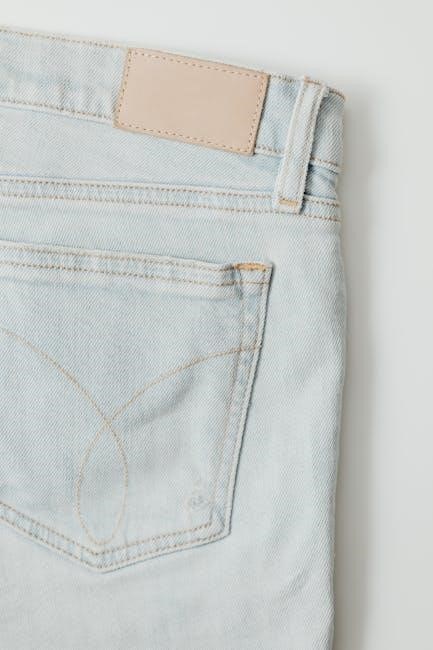
A welt pocket is a bound pocket, creating a clean, finished opening on the garment’s exterior․ Unlike patch or inseam pockets, a welt pocket doesn’t have facing or visible stitching around the opening․ Instead, it utilizes a strip of fabric – the welt strip – folded and secured to form a slit․
This construction method results in a sophisticated, streamlined appearance․ Welt pockets are commonly found on tailored clothing like suit jackets, trousers, and skirts, adding a touch of elegance․ They can be simple, single-welted, or more complex, featuring double welts or flaps for added functionality and style․ The technique requires precision, but the outcome is a professional-looking detail․
Why Use Welt Pockets?
Welt pockets elevate a garment’s appearance, offering a polished and professional finish that distinguishes it from simpler pocket styles․ They provide a subtle yet impactful detail, showcasing sewing skill and attention to quality․ Beyond aesthetics, welt pockets are surprisingly functional, offering secure storage for small items․
Their clean design integrates seamlessly into the garment’s overall silhouette, avoiding the bulkiness of other pocket types․ Whether adding a classic touch to tailored pieces or a modern detail to casual wear, welt pockets enhance both form and function, making them a valuable addition to any sewing project․
Materials and Tools
Successful welt pocket construction requires appropriate fabrics, interfacing for stability, and essential sewing tools like scissors, pins, a ruler, and an iron․
Fabric Selection for Welt Pockets
Choosing the right fabric is crucial for a durable and aesthetically pleasing welt pocket․ Ideally, select a fabric that complements or matches your garment’s main fabric in weight and fiber content; Lightweight fabrics like silk or rayon require delicate handling and may benefit from a stabilizing interfacing․
For sturdier garments, consider medium-weight fabrics such as cotton twill, linen, or wool blends․ Avoid overly stretchy fabrics, as they can distort the pocket opening․ The welt strip itself can often be cut from scraps of the garment fabric or a coordinating material, ensuring a seamless look․ Remember to pre-wash all fabrics to prevent shrinkage after construction!
Interfacing Options
Interfacing provides essential support and structure to welt pockets, preventing stretching and ensuring a clean finish․ Fusible interfacing is a popular choice for its ease of application – simply iron it onto the wrong side of the fabric before cutting the pocket opening․ Lightweight fusible interfacing works well with delicate fabrics, while medium-weight options suit most garment materials․
For added stability, consider using a woven interfacing․ It offers a crisper finish but requires basting before sewing․ The interfacing should extend beyond the pocket opening to adequately reinforce the surrounding fabric․ Proper interfacing selection is key to a professional-looking welt pocket!
Essential Sewing Tools
Creating welt pockets demands precision, so having the right tools is crucial․ A sharp pair of scissors or a rotary cutter is needed for accurate fabric cutting․ A seam ripper proves invaluable for correcting any mistakes during the process․ You’ll also require a good quality iron and ironing board for crisp pressing at each stage․
Other helpful tools include a ruler or measuring tape for precise marking, tailor’s chalk or a fabric marker for outlining the pocket opening, and a variety of needles suitable for your chosen fabric․ Don’t forget pins to hold fabric layers securely!
Preparing the Pocket Opening
Accurate pocket placement is key; carefully mark and cut the opening on your garment, then reinforce it with fusible interfacing for stability and a clean finish․
Marking the Pocket Placement
Precise marking is fundamental for a professional-looking welt pocket․ Begin by determining the desired location for your pocket on the garment․ Use a ruler and fabric marker or tailor’s chalk to carefully draw the pocket opening․ Consider the overall design and functionality when deciding on placement – ensure it’s accessible and aesthetically balanced․
Typically, a welt pocket opening ranges from 5 to 7 inches in length, but this can be adjusted based on your preference and the garment’s style․ Remember to mark both the top and bottom of the opening clearly․ For angled welt pockets, offset the stitching lines accordingly, keeping the welt ends on the straight grain for optimal results․
Cutting the Pocket Opening
Carefully cut along the marked pocket opening lines using sharp scissors or a seam ripper․ Accuracy is crucial here; a clean, precise cut ensures a neat welt․ Avoid stretching the fabric while cutting, as this can distort the opening’s shape․ Reinforce the edges of the cut opening with a stay stitch, especially for delicate fabrics, to prevent fraying and maintain the opening’s integrity during subsequent sewing steps․
A stay stitch, sewn just inside the marked line, provides stability and prevents unwanted stretching․ This small step significantly contributes to the final quality and appearance of the welt pocket․
Applying Fusible Interfacing
Fuse interfacing to the wrong side of the garment fabric, directly behind the marked pocket opening․ This reinforcement provides stability and prevents stretching, crucial for a clean welt․ Ensure the interfacing is slightly smaller than the marked opening to avoid visible lines on the right side of the fabric․ Use a pressing cloth to protect your fabric while fusing, applying even pressure and heat according to the interfacing manufacturer’s instructions․
Properly applied interfacing is key to a durable and professional-looking welt pocket, maintaining its shape and preventing distortion over time․

Creating the Welt Strip
Welt strips are cut from matching or contrasting fabric, folded precisely, and pressed to form the visible pocket welt, defining the opening’s shape and style․
Cutting the Welt Strip Fabric
Precisely cutting the welt strip fabric is crucial for a clean finish․ Typically, the strip’s length should be slightly longer than the pocket opening, allowing for ease during attachment and preventing strain․ The width is determined by the desired welt width – usually two to three times the finished width, accounting for folding and seam allowances․
Cut the strip on the grain for stability and to prevent stretching․ Using a rotary cutter and ruler ensures accuracy․ Remember to add seam allowances consistently along all edges․ Some tutorials suggest bias-cut strips for greater flexibility, especially when working with curved pocket openings, but straight grain is generally recommended for beginners․
Folding and Pressing the Welt Strip
Accurate folding and pressing are fundamental to welt pocket construction․ First, fold the welt strip lengthwise with wrong sides together, precisely matching the long edges․ Press this fold firmly to create a crisp crease, establishing the center line․ Next, fold each long edge towards the center crease, again pressing firmly to define the finished edges of the welt․
This creates a double-folded strip with raw edges concealed within․ Consistent pressing is vital; use steam for a sharper crease․ Ensure the folded strip is symmetrical and the width is uniform throughout its length, as this will directly impact the final appearance of the welt․
Attaching the Welt Strip to the Garment
Position the folded welt strip onto the garment, aligning the open edges with the marked pocket opening․ Pin securely, ensuring the center crease of the welt strip aligns perfectly with the center marking on the garment․ The raw edges of the welt strip should be hidden inside the pocket opening․ Baste the welt strip in place to prevent shifting during sewing․
Precise placement is crucial for a clean finish․ Double-check alignment before proceeding to stitching․ The goal is to seamlessly integrate the welt strip, creating the illusion that it’s part of the garment itself․

Sewing the Welt Pocket
Stitch the welt strip carefully, creating the pocket opening and reinforcing corners for durability․ Precision is key for a professional-looking welt pocket finish․
Stitching the Welt Strip in Place
Begin by carefully stitching the welt strip to the garment, following the marked lines with precision․ Use a standard straight stitch and ensure consistent seam allowance for a clean finish․ Pay close attention to the corners, as these areas require reinforcement to prevent fraying and maintain shape․
After stitching, gently press the welt strip in place, ensuring it lies flat against the garment fabric․ This step is crucial for creating a crisp, well-defined welt opening․ Take your time and use a suitable iron temperature for your chosen fabric․ Accurate stitching and pressing are fundamental to a successful welt pocket construction․
Creating the Welt Opening
To form the welt opening, carefully clip into the seam allowance at each end of the stitched welt strip, approaching the stitching line but avoiding cutting through it․ This allows the fabric to turn freely and create a clean slit․ Gently push the welt strip through the opening, using a point turner or similar tool to ensure a sharp, defined edge․
Press the welt flat, ensuring the folded edges are neatly aligned․ This step is vital for achieving a professional finish․ The opening should be crisp and symmetrical, showcasing the precision of your work․ Proper clipping and pressing are key to a beautifully formed welt pocket․
Reinforcing the Welt Corners
Welt corners require reinforcement to prevent fraying and maintain their shape over time․ Secure these areas with small, precise stitches, either by hand or using a sewing machine․ Backstitching at the beginning and end of each seam adds extra durability․
Consider a tiny triangle of interfacing applied to the wrong side of the corners before stitching for added stability․ This prevents stretching and ensures a clean, professional finish․ Careful corner reinforcement is crucial for a welt pocket that withstands wear and tear, preserving its polished appearance․
Attaching the Pocket Bag
Secure the pocket bag to the welt, ensuring a neat finish․ Precise stitching and careful alignment are key for a functional and aesthetically pleasing pocket․
Cutting the Pocket Bag Fabric
Precisely cut the pocket bag fabric to the appropriate dimensions, typically slightly larger than the desired pocket opening to allow for seam allowances and ease of movement․ Consider the intended use of the pocket when determining the size; deeper pockets require larger fabric pieces․
Use a sharp rotary cutter or fabric scissors for clean, accurate cuts․ Ensure the grainline of the fabric is aligned correctly for stability and to prevent stretching․ Double-check measurements against your pattern piece before cutting to avoid errors․ The pocket bag fabric should complement the garment’s main fabric in weight and drape for a harmonious finish․
Attaching the Pocket Bag to the Welt
Carefully align the pocket bag with the wrong side of the welt, ensuring the edges are even and the corners are neatly matched․ Pin the pocket bag securely in place, paying close attention to the opening of the welt․ Begin stitching around the perimeter of the pocket bag, using a consistent seam allowance․
Backstitch at the beginning and end of your stitching to reinforce the seams․ Take your time and maintain a straight stitch line for a professional finish․ Gently ease the fabric as you sew, avoiding any puckering or distortion․ This step establishes the functional pocket within the decorative welt․
Securing the Pocket Bag
Once stitched, reinforce the pocket bag’s attachment by carefully trimming any excess fabric around the seam allowance, reducing bulk and creating a cleaner finish․ Consider a second row of stitching close to the edge for added durability, especially in high-stress areas․ Press the pocket bag flat, ensuring a smooth transition between the welt and the bag itself․
Inspect the corners for any loose threads or uneven stitching, addressing them promptly․ A well-secured pocket bag is crucial for longevity and prevents unraveling․ This final step solidifies the pocket’s construction, making it both functional and aesthetically pleasing․
Finishing the Welt Pocket
Final touches refine the welt pocket: trim excess fabric, press for a crisp shape, and consider topstitching for durability and a polished, professional appearance․
Trimming Excess Fabric
Carefully trim away any excess fabric from the back of the welt pocket and around the pocket bag attachment․ Precision is key here to avoid any bulkiness that could distort the pocket’s shape or create visible lumps in the garment․ Use sharp scissors and trim close to the stitching lines, but avoid cutting into the stitches themselves․
Pay particular attention to the corners of the welt, ensuring they are neatly trimmed to create a clean, defined edge․ Removing excess interfacing is also crucial for a softer finish․ A thorough trim ensures a professional-looking welt pocket that lies flat and integrates seamlessly into the garment’s design․
Pressing the Welt Pocket
Pressing is vital for achieving a crisp, professional welt pocket․ Begin by gently pressing the welt itself, shaping it neatly and ensuring the edges lie flat․ Use a pressing cloth to protect the fabric, especially delicate materials․ Next, press the entire pocket area, focusing on the welt opening to define its shape and create a clean line․
Pay attention to the pocket bag attachment, pressing it firmly to secure it in place․ Proper pressing not only enhances the appearance but also helps the pocket maintain its form during wear and washing, contributing to the garment’s overall quality․
Topstitching the Welt Pocket
Topstitching adds a refined detail and reinforces the welt pocket’s structure․ Using a coordinating or contrasting thread, carefully topstitch along the edges of the welt, approximately 1/8 inch from the seam․ This defines the pocket opening and prevents stretching․ Ensure consistent stitch length and maintain a straight line for a professional finish․
Topstitching also secures the pocket bag, preventing it from shifting or puckering․ Consider double topstitching for added durability, especially on high-wear areas like trousers or jackets․ A well-executed topstitch elevates the overall look of the garment․

Welt Pockets with Flaps
Welt pockets with flaps introduce a sophisticated element, requiring precise sewing and fabric manipulation for a secure and aesthetically pleasing finish to your garment․
Preparing the Flap
Creating the flap for a welt pocket requires careful cutting and interfacing to maintain its shape and structure․ Begin by cutting the flap fabric – typically the same material as the garment – to the desired size and shape, considering the desired coverage and aesthetic․
Fusible interfacing is crucial; apply it to the wrong side of the flap fabric to provide stability and prevent stretching during sewing․ This reinforcement ensures the flap lies flat and maintains its form when attached to the welt․ Precise cutting and pressing are essential for a clean, professional finish․ Remember to account for seam allowances when cutting the flap piece․
Attaching the Flap to the Welt
Securing the flap to the welt demands precision․ Position the prepared flap onto the welt, ensuring correct alignment and desired overhang․ Pin the flap securely in place, paying close attention to the edges․ Stitch the flap to the welt using a straight stitch, maintaining a consistent seam allowance․
Reinforce the stitching at the corners and edges of the flap for added durability․ Carefully press the seam allowance open, creating a smooth transition between the flap and the welt․ This step is vital for a polished appearance and prevents puckering․ Accurate alignment and careful stitching are key to a professional finish․
Securing the Flap
Finalizing the flap’s attachment involves reinforcing the stitching for longevity․ Stitch around the entire perimeter of the flap, close to the edge, to firmly secure it to the welt․ Consider a second row of stitching for added strength, especially if the flap will experience frequent use or stress․
Pressing is crucial; carefully press the flap and welt together, ensuring a flat, neat finish․ Pay attention to the corners and edges, shaping them for a clean look․ A well-secured flap enhances both the functionality and aesthetic appeal of the welt pocket, completing this tricky construction․

Advanced Welt Pocket Techniques
Explore variations like angled and double welt pockets, or adapt techniques for curved garments, expanding your skills beyond basic construction for unique designs․
Angled Welt Pockets
Creating an angled welt pocket introduces a dynamic visual element to your garment design․ The technique involves offsetting the top and bottom stitching lines during welt strip attachment․ This simple adjustment alters the welt’s orientation, resulting in a diagonal opening instead of a straight one․
Ensure the ends of the welt remain aligned with the fabric’s straight grain for stability and a clean finish․ Precise marking and careful stitching are crucial for achieving a symmetrical and professional-looking angled welt․ This subtle detail can significantly enhance the overall aesthetic of your project, adding a touch of sophistication and tailoring expertise․
Double Welt Pockets
Double welt pockets offer increased durability and a more substantial appearance compared to single welts․ This construction utilizes two layers of welt strip fabric, creating a reinforced opening and a refined, layered aesthetic․ The process requires meticulous attention to detail, particularly when aligning and stitching the two welt strips together․
This technique is ideal for garments subjected to frequent use, such as workwear or outerwear, where pocket longevity is paramount․ While demanding more precision, the resulting double welt pocket provides a luxurious feel and enhanced functionality, elevating the overall quality of the finished piece․
Welt Pockets on Curved Garments
Applying welt pockets to curved garments, like skirts or fitted dresses, presents unique challenges․ The key lies in accurately shaping the welt strip to follow the garment’s contour, ensuring a smooth, seamless integration․ Careful pattern adjustments and precise pinning are crucial for achieving a professional finish․
Consider easing the welt strip into the curve, potentially using a slightly longer strip and gently manipulating the fabric during stitching․ This technique minimizes puckering and maintains the pocket’s structural integrity․ Patience and meticulous pressing are essential for a beautifully formed welt on a curved surface․
Troubleshooting Common Issues
Common problems like puckering, uneven openings, or visible pocket bags can occur․ Careful pressing, accurate stitching, and interfacing are key to resolving these issues effectively․

Welt Puckering
Welt puckering often arises from tension imbalances during sewing or insufficient pressing․ Ensure consistent stitch length and avoid pulling the fabric while machine sewing the welt strip․ Applying a lightweight fusible interfacing correctly stabilizes the fabric, minimizing distortion․
Carefully press the welt after each step, using a pressing cloth to protect the fabric’s surface․ If puckering persists, gently ease the fabric while pressing, or slightly loosen the stitch tension on your sewing machine․ A walking foot can also help feed layers evenly, preventing puckering, especially with slippery fabrics․ Remember, patience and precise technique are crucial!
Uneven Welt Opening
An uneven welt opening typically stems from inaccurate marking or imprecise cutting of the initial pocket opening․ Double-check your measurements and use a sharp rotary cutter or fabric scissors for clean, even cuts․ Consistent stitch length is also vital when securing the welt strip; variations can cause asymmetry․
When attaching the welt strip, ensure both sides are aligned perfectly before stitching․ Pressing is key – carefully press the welt open after each stage to establish a crisp, symmetrical opening․ If slight unevenness remains, gentle easing during pressing can often correct it․
Pocket Bag Visibility
Pocket bag visibility occurs when the lining fabric peeks through the welt opening, detracting from the clean finish․ To prevent this, ensure the pocket bag is cut slightly smaller than the welt opening to allow for a secure, concealed attachment․ Precise stitching around the welt is crucial; any gaps will reveal the bag․
When attaching the pocket bag, carefully turn the edges under and stitch close to the welt, creating a neat, enclosed seam․ A narrow seam allowance helps minimize visibility․ Pressing the finished pocket flat further conceals the bag, ensuring a professional appearance․

Resources and Further Learning
Explore free patterns, online video tutorials, and recommended sewing books to deepen your understanding and refine your welt pocket construction skills․
Free Welt Pocket Patterns
Numerous online resources offer free downloadable pattern pieces for practicing welt pocket construction․ These patterns are invaluable for beginners, allowing them to familiarize themselves with the shapes and dimensions required for a successful outcome․
In-House Patterns provides full-scale single welt pocket patterns, perfect for mastering the professional technique․ Downloading your own copy is recommended for individual practice․ These patterns eliminate the need to draft your own, streamlining the learning process and enabling quicker project starts․
Utilizing these free resources allows you to build confidence and refine your skills before applying welt pockets to your favorite sewing projects․
Online Video Tutorials
Visual learners will greatly benefit from the abundance of online video tutorials dedicated to welt pocket construction․ These resources demonstrate each step of the process, from marking the pocket opening to attaching the pocket bag, in a clear and concise manner․
Many tutorials showcase both single and double welt pocket variations, including those with flaps, offering a comprehensive understanding of the techniques involved․ Following along with a video allows for real-time observation of fabric manipulation and stitching precision․
These tutorials are excellent for reinforcing written instructions and troubleshooting potential challenges․
Recommended Sewing Books
For a deeper dive into tailoring techniques, several sewing books offer detailed instructions on welt pocket construction․ These resources often provide comprehensive illustrations and explanations, covering various welt pocket styles and advanced variations․
Look for books focusing on tailoring or couture sewing, as they typically dedicate significant attention to precise pocket placement and finishing․ Kathleen Fassanella’s resources, often referenced online, provide valuable insights into professional techniques․
These books serve as excellent references for building a strong foundation in garment construction․