
starry sky projector instructions
Starry sky projectors transform any room into a mesmerizing celestial display, offering relaxation and ambiance. Recent models, like the astronaut projector, are gaining popularity.
These devices utilize LED technology to project realistic nebulae and stars onto ceilings and walls, creating a captivating atmosphere. Troubleshooting guides are readily available.
Understanding operation, including power sources and controls, ensures optimal performance. Maintaining the lens and addressing temperature concerns prolongs projector lifespan.
User manuals, such as the NDTUSMZ guide, provide detailed instructions, while online forums offer community support for common issues like rotation problems.
What is a Starry Sky Projector?
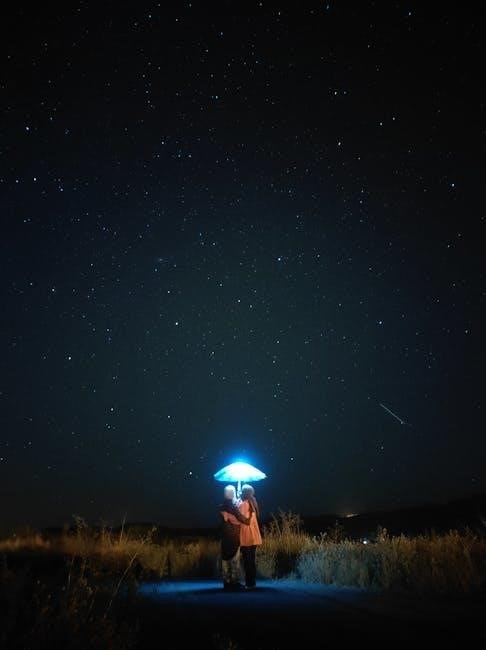
Starry sky projectors are innovative devices designed to simulate a breathtaking night sky within the comfort of your home. These projectors employ LED technology, coupled with sophisticated optics, to cast realistic nebulae and twinkling stars onto ceilings and walls.
Popular models, like the astronaut-themed projectors, are becoming increasingly common. They aren’t simply night lights; they’re immersive experiences. They offer a calming ambiance, perfect for relaxation, meditation, or creating a unique atmosphere for gatherings.
These devices often feature adjustable settings, allowing users to customize the projection’s color, brightness, and rotation speed. Troubleshooting guides are available for common issues.
Benefits of Using a Starry Sky Projector
Starry sky projectors offer a multitude of benefits, primarily centered around creating a relaxing and immersive atmosphere. They can significantly reduce stress and anxiety, promoting better sleep quality, especially for children or those sensitive to darkness.
Beyond relaxation, these projectors enhance room aesthetics, transforming ordinary spaces into captivating celestial environments. They’re excellent for parties or creating a unique ambiance.
Many models include timer settings for convenient use, and troubleshooting resources are available online. Addressing temperature concerns ensures optimal laser performance and longevity.
Unboxing and Component Check
Carefully unpack your starry sky projector and verify all components are present. Ensure the projector, power cable (USB or adapter), and user manual are included.
Inspect for any visible damage during shipping. Refer to the manual (like the NDTUSMZ guide) for a parts list.
Package Contents
Typically, your starry sky projector package will include the main projector unit itself, often featuring a unique design like the popular astronaut model. A USB power cable is almost always included, allowing connection to a power bank or computer.
Some models also ship with a separate AC power adapter for direct wall outlet use. Crucially, locate the user manual – the NDTUSMZ manual is a good example – as it details all included parts and provides setup guidance.
Occasionally, you might find additional accessories like remote controls or extra lens covers. Carefully inventory all items against the manual’s list to ensure nothing is missing before proceeding.
Identifying the Parts
The core component is the projector housing, which varies depending on the model – astronaut designs are common. Locate the lens, responsible for projecting the nebula and stars; keep this clean for optimal clarity. Identify the power input, typically a USB-C port or a dedicated adapter jack.
Familiarize yourself with the control buttons – power, mode selection, brightness, and rotation speed are standard. For astronaut models, note the head’s adjustable angle.
Internally, the motor assembly controls rotation, a frequent point of repair if malfunctioning. Understanding these parts aids troubleshooting and maintenance, ensuring a captivating starry display.

Setting Up Your Projector
Proper setup is crucial for an immersive experience. Connect the projector via USB, batteries, or adapter. Position it on a stable surface for optimal projection coverage.
Experiment with angles to achieve desired effects, ensuring the lens faces the ceiling or wall.
Power Source Options (USB, Batteries, Adapter)
Starry sky projectors offer versatile power solutions for convenient use. Many models, including the popular astronaut projectors, can be powered via a standard USB cable, connecting to a power bank, computer, or USB wall adapter.
Alternatively, some projectors operate on batteries, providing portability for use in various locations. Check your projector’s specifications for the correct battery type.
Finally, an AC adapter is often included, offering a stable and reliable power source. Reconnecting the USB cable firmly or trying another outlet can resolve power issues. Using a phone charger is also a viable option.
Positioning for Optimal Projection
Achieving the best starry sky effect relies on strategic projector placement. For expansive coverage, position the projector centrally within the room, aiming towards the ceiling. Experiment with distance; closer proximity creates a smaller, brighter projection, while further distances yield a larger, dimmer display.
Ensure the projection surface is relatively smooth and free from obstructions.
Consider the room’s ambient light; darker environments enhance the nebula and star visibility. Adjusting the projector’s angle can also fine-tune the projection’s focus and coverage, maximizing the immersive experience.

Understanding the Control Buttons & Functions
Control buttons manage power, light modes (nebula, stars, combo), brightness, rotation speed, and timers. Proper function ensures desired ambiance.
Firm USB connections and alternative outlets resolve power issues, while adjustments restore star patterns.
Power Button
The power button initiates and terminates the projector’s operation. A firm press typically activates the device, illuminating the nebula and star patterns. If the projector fails to power on, verify the USB cable connection or battery installation.
Ensure the cable is securely plugged into both the projector and a functioning power source, or replace batteries with fresh ones. Trying a different outlet or a phone charger can also resolve power-related issues. Inspect the adapter for damage.
A brief press may cycle through preset modes, while a longer press usually turns the unit off completely.
Light Mode Selection (Nebula, Stars, Combination)
Most starry sky projectors offer versatile lighting modes. The ‘Nebula’ mode projects swirling, colorful cloud-like formations, simulating distant galaxies. ‘Stars’ mode displays twinkling star patterns, creating a classic night sky effect. The ‘Combination’ mode blends both nebula and stars for a dynamic display.
Selecting modes is usually achieved through dedicated buttons or a remote control. Some models allow customization of nebula color and star density. If stars aren’t appearing, ensure the star mode is activated.
Experiment with different combinations to achieve your desired ambiance.
Brightness Adjustment
Adjusting brightness is crucial for optimal viewing and comfort. Starry sky projectors typically feature multiple brightness levels, controlled via buttons or a remote. Lower brightness settings are ideal for creating a subtle, relaxing atmosphere, especially in darker rooms.
Higher settings enhance visibility in brighter environments, but may be too intense for prolonged viewing. If the projector appears dim, ensure it’s not set to the lowest level.
Experiment to find the perfect balance for your space and preference.
Rotation Speed Control
Rotation speed control adds dynamic movement to your projected starry sky. Most projectors offer several speed settings – slow, medium, and fast – or even a static option for no rotation. A slower rotation creates a gentle, calming effect, mimicking the Earth’s subtle movement.
Faster speeds provide a more energetic display.
If rotation isn’t functioning, check power connections and the motor assembly. Some models, like the astronaut projector, may require repair after a drop.
Timer Settings
Timer settings allow for automated operation of your starry sky projector, conserving energy and providing convenience. Common timer options include 30, 60, and 90-minute intervals, automatically shutting off the projector after the selected duration.
This feature is ideal for use as a night light or for falling asleep under the stars.
If issues arise, ensure a stable power supply. Ambient temperature can also affect laser performance, potentially causing temporary malfunctions that resolve themselves.

Troubleshooting Common Issues
Common problems include the projector not powering on, missing stars, incorrect nebula projection, or a non-rotating motor. Check connections and power sources first!
Flickering lights may indicate a loose cable or internal component issue. Refer to the user manual for guidance.
Projector Not Turning On
If your starry sky projector fails to power on, begin by verifying the power source. Ensure the USB cable is firmly connected to both the projector and a functioning USB port or wall adapter.
Attempt using a different USB cable or adapter, and even test with a phone charger to rule out compatibility issues. Inspect the power adapter for any visible damage.
Confirm the outlet is providing power by testing it with another device. Check internal connections if comfortable, but proceed cautiously. A faulty adapter is a frequent cause.
If issues persist, consult the user manual or online support forums for further assistance and potential troubleshooting steps specific to your model.
No Stars Appearing
If the nebula projects but stars are absent, allow a few minutes for them to initialize; they may gradually return to normal. This is especially true after initial use or temperature fluctuations.
Ensure the star mode is selected, as some projectors offer nebula-only settings. Verify the brightness level isn’t set too low, obscuring the stars. Check for obstructions blocking the star projection lens.
If the problem persists, a temporary malfunction might be occurring. Try cycling the power off and on. High ambient temperatures can also affect laser performance.
Consult the user manual for specific star adjustment options or contact support if the issue continues, as it could indicate a component failure.
Nebula Not Projecting Correctly
If the nebula appears distorted or doesn’t project at all, first confirm the correct light mode is selected – ensure it’s set to ‘Nebula’ or ‘Combination’. Check the projector’s focus; slight adjustments can dramatically improve clarity.
Ensure the lens is clean and free of dust or smudges, as these can scatter the light. Verify the projector is positioned correctly for optimal projection distance and angle.
A faulty LED board could be the cause; inspect for visible damage. Try a different power source (USB port, adapter) to rule out power delivery issues.
If problems persist, consult the user manual or seek support, as internal component repair may be necessary.
Rotation Not Working
If your starry sky projector isn’t rotating, initially check if the rotation function is activated via the control buttons. Ensure the speed isn’t set to the lowest setting, which may appear as no rotation.
For astronaut models, a recent drop could have dislodged internal connections within the motor assembly. Carefully inspect these connections.
A potential motor replacement might be required if connections are secure but rotation remains absent. Confirm sufficient power is reaching the unit; a weak power source can hinder motor function.
Consult repair videos for guidance, and remember to disconnect power before any internal inspection.
Flickering Lights
Experiencing flickering lights in your starry sky projector? First, verify the power connection is secure, trying a different outlet or USB port. A faulty USB cable or adapter can cause inconsistent power delivery, leading to flickering.
High ambient temperatures can also contribute to this issue; the laser projector may temporarily reduce intensity. Allow the unit to cool down.
If flickering persists, inspect the internal LED board for any visible damage. A loose connection or damaged component may require professional repair or replacement.
Ensure the projector isn’t obstructed, as this can affect airflow and contribute to overheating.

Repairing a Non-Rotating Projector (Astronaut Model)
If your astronaut projector isn’t rotating after a drop, carefully check the motor assembly connections. A video demonstrates repair steps, potentially requiring motor replacement.
Inspect for internal damage and ensure secure wiring.
Identifying the Motor Assembly
Locating the motor assembly within the astronaut projector is crucial for repair. Typically, it’s housed in the base of the astronaut’s head or neck, responsible for the rotating motion.
Carefully disassemble the projector, noting the placement of screws and components. The motor is usually a small, cylindrical component connected to a gear system.
Inspect the assembly for any visible damage, such as broken wires or stripped gears. Refer to repair videos for visual guidance on identifying the specific motor within your model.
Remember to disconnect the power source before any disassembly to prevent electrical shock.
Checking Connections
After identifying the motor assembly, meticulously check all electrical connections. Begin by ensuring the power adapter and USB cable are firmly connected to both the projector and the power source.
Inspect the internal wiring within the projector, looking for loose or disconnected wires leading to the motor. Gently reseat any connections that appear insecure.
A faulty connection is a common cause of non-rotation. Use a multimeter to test continuity if you suspect a broken wire. Reconnect everything securely before testing.
Remember to always disconnect the power before inspecting internal wiring.
Potential Motor Replacement
If connections are secure and the motor still fails to operate, replacement may be necessary. Locate a compatible replacement motor specifically designed for your projector model.
Carefully disassemble the projector, noting the motor’s original position and wiring configuration. Disconnect the old motor and connect the new one, ensuring correct polarity.
Secure the new motor in place and reassemble the projector. Test the rotation function to confirm successful replacement.
Motor replacement requires technical skill; consider professional repair if unsure.

Addressing Temperature-Related Issues
Overheating can affect laser performance; stars may not return to normal quickly. Optimal operating temperatures ensure consistent projection. Avoid prolonged use in hot environments.
Allow the projector to cool before resuming operation if overheating occurs, ensuring optimal functionality.
Overheating and Laser Performance
Prolonged operation, particularly in warmer ambient temperatures, can lead to overheating within the projector’s internal components. This directly impacts the laser diode’s performance, potentially causing diminished brightness or inconsistent star projection.
Specifically, the laser may exhibit temporary malfunctions, where the stars appear distorted or cease to function altogether. The system is often designed with thermal protection, but consistent overheating can shorten the projector’s lifespan.
If overheating is suspected, immediately power off the device and allow it sufficient time to cool down before attempting to resume operation. Maintaining proper ventilation around the projector is crucial.
Optimal Operating Temperature
To ensure peak performance and longevity of your starry sky projector, maintaining an optimal operating temperature is essential. Generally, these projectors function best within a range of 60°F to 77°F (15°C to 25°C).
Avoid direct sunlight exposure and operating the device in excessively hot or humid environments. As noted, high temperatures can cause the laser to malfunction, with stars potentially needing minutes to normalize.
Proper ventilation is key; ensure the projector isn’t enclosed in a tight space. Consistent operation within the recommended temperature range will maximize brightness and prevent premature component failure.

Maintaining Your Starry Sky Projector
Regular cleaning of the lens and dust removal are vital for optimal projection quality. Proper storage, when not in use, protects the device from damage.
Consistent care ensures vibrant nebula and star displays, extending the projector’s lifespan and maintaining its captivating aesthetic appeal.
Cleaning the Lens
Maintaining a pristine lens is crucial for a clear and vibrant projection. Dust and fingerprints significantly diminish the quality of the nebula and stars.
Use a soft, microfiber cloth – avoid abrasive materials that could scratch the lens surface. Gently wipe in a circular motion to remove any accumulated debris.
For stubborn smudges, slightly dampen the cloth with distilled water, ensuring it’s not overly wet. Never spray liquid directly onto the projector.
Regular lens cleaning, ideally before each use, guarantees the best possible viewing experience and preserves the projector’s performance over time.
Dust Removal
Accumulated dust inside the projector can obstruct light paths and affect projection clarity. Regular dust removal is essential for optimal performance and longevity.
Power off and unplug the projector before attempting any cleaning. Use a can of compressed air to gently blow dust from vents and internal components.
Avoid using a vacuum cleaner, as it can create static electricity and potentially damage sensitive electronics. Focus on areas where dust visibly collects.
Periodic internal dust removal, alongside lens cleaning, ensures consistently brilliant nebulae and sharp, defined stars in your celestial display.
Proper Storage
Long-term storage requires careful preparation to prevent damage and maintain functionality. Always power off and unplug the projector before storing it away.
Store the projector in a cool, dry place, away from direct sunlight and extreme temperatures. The ideal storage environment minimizes potential overheating issues.
Consider using the original packaging or a padded case to protect the projector from physical impacts during storage. This safeguards delicate components.
Regularly check the stored projector to ensure no moisture buildup or signs of deterioration have occurred, preserving its celestial projection capabilities.
Safety Precautions
Laser safety is paramount; avoid direct eye exposure. Ensure proper electrical safety by using a compatible power source and undamaged cables.
Never disassemble the projector beyond recommended repair steps, and keep it away from water to prevent hazards.
Laser Safety Warnings
Caution: Direct exposure to the laser light emitted by starry sky projectors can be harmful to the eyes. Never look directly into the projector lens while it is operating.
Supervise children closely when the projector is in use to prevent accidental eye exposure. Avoid pointing the projector beam towards people or animals.
Although these projectors are generally low-power, prolonged or intense exposure could cause vision impairment. If you experience any discomfort or vision changes, discontinue use immediately and consult a medical professional.
Do not attempt to modify or disassemble the laser components, as this could increase the risk of harmful exposure.
Electrical Safety
Important: Always ensure the power source matches the projector’s voltage requirements. Using an incompatible power adapter can damage the device and pose a fire hazard.
When using a USB connection, verify the port provides sufficient power. A phone charger can be used as an alternative, but ensure it’s a reputable brand.
Inspect the power cable regularly for any signs of damage, such as fraying or exposed wires. Do not operate the projector if the cable is damaged.
Avoid using the projector in damp or wet environments to prevent electrical shock.

Frequently Asked Questions (FAQs)
Q: Can I use a phone charger? A: Yes, a phone charger can often provide sufficient power for operation.
Q: What if the stars don’t return to normal? A: They usually normalize after a few minutes, especially in warmer temperatures.
Q: How do I adjust the focus? A: Refer to your user manual for specific focus adjustment instructions.
Can I use a phone charger?
A: Generally, yes, you can often utilize a standard phone charger with your starry sky projector. Most projectors operate on 5V power, which is a common output for phone chargers. However, it’s crucial to ensure the charger provides sufficient amperage (at least 1A, but 2A is preferable) for optimal performance.
Using a charger with insufficient amperage might result in dim projections or the projector failing to turn on altogether. If you experience issues, try a different charger with a higher amperage rating. Always prioritize using the provided adapter when possible for consistent results.
What if the stars don’t return to normal?
A: If the stars appear distorted or don’t revert to their usual pattern after being disturbed, don’t worry! Often, this is a temporary effect related to temperature. The laser projector may require a few minutes to recalibrate and return to normal operation, especially in warmer environments.
Ensure the projector isn’t overheating. If the issue persists beyond a few minutes, try power cycling the device. A firm reconnection of the USB cable can also resolve this. If problems continue, consult the user manual.
How do I adjust the focus?
A: Unfortunately, many starry sky projectors, particularly the more compact models like the astronaut projector, do not have manual focus adjustment capabilities. The clarity of the projected image relies heavily on the distance from the projector to the surface.
Experiment with positioning the projector closer or further away from the ceiling or wall to achieve the sharpest possible image. Ensure the projection surface is smooth and relatively flat for optimal results. A slight tilt can also improve clarity.
User Manual Resources
Official user manuals, like the NDTUSMZ 3-in-1 LED Starry Sky Projector Light guide (available as a PDF), offer comprehensive instructions.
Online support forums provide a platform for users to share experiences, troubleshoot issues, and find solutions for common projector problems.
Finding the Official User Manual (NDTUSMZ Example)
Locating the official user manual is crucial for understanding your starry sky projector’s features and operation. For the NDTUSMZ 3-in-1 LED Starry Sky Projector Light, a PDF version is readily available online.
A simple web search using the model number (“NDTUSMZ 3 in 1 LED Starry Sky Projector Light User Manual”) will direct you to the downloadable document; This manual details setup, control functions, and troubleshooting steps.
It provides specific guidance on addressing issues like rotation problems or laser performance, ensuring you can maximize your projector’s potential and maintain its functionality.
Online Support Forums
Numerous online support forums cater to starry sky projector enthusiasts, offering a valuable resource for troubleshooting and sharing experiences. These communities provide a platform to ask questions, seek advice, and find solutions to common issues.
Users frequently discuss repair techniques, like fixing non-rotating astronaut models, and address concerns regarding laser performance or flickering lights. Sharing experiences helps others resolve similar problems.
These forums often contain user-generated guides and tips, supplementing the official manual and providing practical insights into maximizing your projector’s functionality.
Advanced Features (If Applicable)
Some projectors offer Bluetooth connectivity for sound synchronization, enhancing the immersive experience. These features allow users to pair devices and play music alongside the visual display.
Exploring these options unlocks a more personalized and dynamic atmosphere, elevating the overall enjoyment of your starry sky projection.
Bluetooth Connectivity
Many modern starry sky projectors now incorporate Bluetooth technology, allowing seamless wireless connection to smartphones, tablets, or other Bluetooth-enabled devices. This feature unlocks the ability to synchronize music with the projected nebula and stars, creating a truly immersive and dynamic atmosphere.
To connect, first, ensure your projector is in Bluetooth pairing mode – typically activated through a dedicated button or within the projector’s settings. Then, on your device, search for available Bluetooth devices and select your projector from the list. Once paired, you can stream audio directly to the projector, enhancing the visual experience with complementary soundscapes.
Experiment with different genres and volumes to find the perfect harmony between light and sound, tailoring the ambiance to your preferences.
Sound Synchronization
Sound synchronization elevates the starry sky projector experience, dynamically linking the projected visuals to the rhythm and intensity of your music. When Bluetooth connected, the nebula and star patterns often pulse, shift, or change color in time with the audio, creating a captivating audio-visual spectacle.
Some projectors offer adjustable synchronization sensitivity, allowing you to fine-tune how closely the lights react to the sound. Experiment with different settings to achieve the desired effect, ranging from subtle pulsations to dramatic, beat-driven displays.
This feature transforms a simple projection into an immersive, multi-sensory experience, perfect for relaxation, parties, or meditation.