
drive walker with seat instructions
Understanding Drive Walkers with Seats
Drive walkers with seats offer mobility and rest‚ featuring foldable designs and adjustable handles for personalized comfort and convenient portability for users.
What is a Drive Walker with Seat?
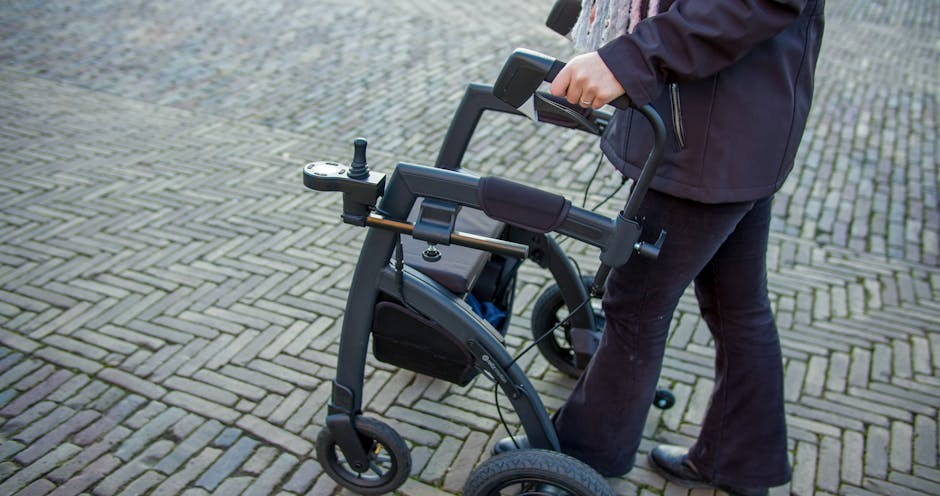
A Drive Walker with Seat‚ often called a rollator‚ is a mobility aid designed to provide support and stability while walking‚ and a place to rest when needed. These walkers typically feature four wheels‚ adjustable height handles for ergonomic comfort‚ and crucially‚ a built-in padded seat.
Unlike traditional walkers requiring full body weight support‚ rollators allow users to maintain a more upright posture. The foldable design‚ as seen in the Drive Medical Aluminum Rollator‚ enhances portability for travel and storage. They are ideal for individuals needing occasional rest during ambulation‚ offering independence and reducing fatigue. Many models‚ like those from Drive Medical‚ also include a storage pouch for personal items.
Benefits of Using a Drive Walker with Seat
Drive walkers with seats provide numerous benefits‚ enhancing independence and quality of life. The integrated padded seat offers a convenient resting spot‚ reducing fatigue during longer walks. Adjustable handles ensure proper posture and ergonomic comfort‚ minimizing strain.
Their lightweight and foldable design‚ exemplified by the Drive Medical Aluminum Rollator‚ allows for easy transport and storage. Rollators promote an active lifestyle by enabling users to remain mobile and engaged. The added stability reduces the risk of falls‚ while the storage pouch conveniently carries personal belongings. Ultimately‚ these walkers empower individuals to maintain their freedom and participate in daily activities.

Key Features of Drive Medical Rollators
Drive Medical rollators boast foldable frames‚ adjustable handles‚ padded seats for rest‚ and versatile 6-inch wheels‚ ensuring both portability and comfortable mobility.
Foldable Design for Portability
Drive Medical rollators are engineered with a convenient foldable design‚ significantly enhancing their portability. This feature allows users to easily store the walker in car trunks‚ closets‚ or other limited spaces when not in use.
The folding mechanism‚ often simple to operate‚ transforms the rollator into a compact size‚ making travel and transport much easier. This is particularly beneficial for individuals who are frequently on the go or have limited storage options at home. The ability to quickly fold and unfold the walker contributes to its overall user-friendliness and practicality‚ promoting independence and an active lifestyle.
Adjustable Height Handles
Drive rollators feature adjustable height handles‚ a crucial element for ensuring proper posture and user comfort. These handles can be easily adjusted using a simple lever mechanism‚ allowing individuals of varying heights to find the optimal ergonomic position.
Correct handle height minimizes strain on the back‚ shoulders‚ and wrists‚ promoting a more comfortable and efficient walking experience. Proper adjustment encourages an upright posture‚ reducing the risk of discomfort or injury during prolonged use. This customizable feature makes the rollator suitable for a wide range of users‚ enhancing its versatility and overall value.
Padded Seat for Resting
Drive Medical rollators incorporate a padded seat‚ providing a convenient resting spot when needed during ambulation. This feature is particularly beneficial for individuals who tire easily or require frequent breaks. The padded design enhances comfort‚ allowing users to sit and rest without discomfort or pressure points.
The seat is often designed to fold up neatly when not in use‚ maintaining the rollator’s streamlined profile. Replacement seat assemblies‚ like the Medline Rollator Replacement Seat Assembly‚ are available for damaged or worn seats‚ ensuring continued functionality and comfort. It’s a vital feature for extended outings.
6-Inch Wheels for Versatility
Drive Medical rollators are commonly equipped with 6-inch wheels‚ striking a balance between maneuverability and stability. These wheels allow for smooth rolling on various indoor surfaces like carpets and tile‚ as well as outdoor terrains such as sidewalks and paved paths.
The wheel size contributes to the rollator’s overall versatility‚ making it suitable for a wide range of environments. Larger wheels generally handle uneven surfaces better‚ while smaller wheels offer increased agility. The Drive Medical Aluminum Rollator Walker utilizes these wheels for reliable indoor/outdoor mobility‚ enhancing user independence.

Assembly Instructions
Drive walker assembly is generally easy‚ requiring minimal effort and time; ensure all components are present before beginning the setup process.

Unboxing and Component Check
Upon receiving your Drive walker‚ carefully open the box and lay out all the components on a protected surface. Verify that you have the walker frame‚ two rear wheels‚ front skis (or wheels)‚ the padded seat‚ back support (if included)‚ and the handlebar assembly.
Consult the included parts list to ensure everything is accounted for. Inspect each part for any shipping damage – scratches‚ dents‚ or broken pieces. If anything is missing or damaged‚ immediately contact the retailer or Drive Medical customer support. Do not attempt assembly with incomplete or damaged parts‚ as this could compromise the walker’s safety and functionality. A thorough check now saves potential issues later.
Adjusting Handle Height
To adjust the handle height on your Drive rollator‚ locate the height adjustment levers typically found on the vertical posts of the handlebars. Release the lever by pressing or pulling (refer to your specific model’s instructions). Then‚ gently raise or lower the handlebars to a comfortable height where your elbows are bent at a natural angle when standing upright.
Ensure both sides are adjusted to the same height. Once the desired height is reached‚ securely re-engage the adjustment levers to lock the handlebars in place. Proper handle height is crucial for comfortable and safe use‚ preventing strain and ensuring optimal control.
Attaching the Back Support (if applicable)
If your Drive walker includes a back support‚ attaching it usually involves sliding the support’s posts into the designated receiver tubes located on the walker’s frame. Align the holes in the posts with those in the frame‚ and secure them using the provided hardware – often screws or push-pins.
Ensure the back support is firmly attached and doesn’t wobble before use. Some models feature adjustable back supports; adjust the height and angle for optimal comfort and support. Regularly check the attachment points to confirm they remain secure during use‚ prioritizing safety and stability.
Using the Drive Walker Safely
Prioritize safe usage by maintaining proper posture‚ utilizing the braking system effectively‚ and adhering to the walker’s specified weight capacity limitations.
Proper Posture and Grip
Maintaining correct posture while using your Drive walker is crucial for comfort and stability. Stand as upright as possible‚ avoiding slouching‚ and keep your shoulders relaxed.
Grip the ergonomic handles firmly but not tensely‚ ensuring your wrists are straight. Adjust the handle height to allow a slight bend in your elbows – this promotes better control and reduces strain.
Distribute your weight evenly across the walker’s frame and your feet. Avoid leaning excessively on the walker; it’s designed to assist‚ not to bear your entire weight. Take deliberate‚ controlled steps‚ and always look ahead to navigate safely.
Braking System Operation
Understanding your Drive walker’s braking system is vital for safe use. Most models feature hand-operated brakes‚ activated by squeezing the levers on the handles.
To engage the brakes‚ squeeze the levers firmly and evenly. This will slow or stop the walker. Practice using the brakes in a safe‚ open area to familiarize yourself with their responsiveness.
Always test the brakes before each use to ensure they are functioning correctly. Release the brakes by gently letting go of the levers. Avoid coasting downhill or applying excessive force‚ as this could compromise braking effectiveness.
Weight Capacity and Limitations
Drive Medical rollators have specific weight capacity limits‚ typically around 300 pounds‚ though bariatric models like the Go-Lite can support up to 500 pounds. Exceeding this limit can compromise the walker’s stability and potentially cause damage or injury.
It’s crucial to check the product specifications for your specific model. These walkers are designed for use on relatively flat‚ even surfaces. Avoid steep inclines‚ uneven terrain‚ and loose gravel‚ as these conditions can increase the risk of falls.
Do not attempt to use the walker as a substitute for a wheelchair or other mobility aid if your needs exceed its capabilities.

Maintenance and Care
Regular cleaning with a damp cloth and replacing worn seat covers or brake cables ensures your Drive walker remains safe and functions optimally.

Cleaning the Walker
Maintaining cleanliness is crucial for the longevity and hygiene of your Drive walker. Regularly wipe down the frame with a damp cloth and mild detergent to remove dirt and debris. Avoid abrasive cleaners‚ as they can damage the finish.
For the padded seat‚ a gentle upholstery cleaner is recommended; ensure it’s fully dry before use to prevent mildew. Inspect the wheels frequently‚ removing any tangled debris. Pay attention to the braking system‚ wiping away any grime that could affect its performance.

Periodically check all connections and fasteners to ensure they remain secure. A clean walker is a safe and reliable walker‚ contributing to a better user experience.
Replacing Seat Covers
Replacing the seat cover is a simple way to refresh your Drive walker and maintain hygiene. Gently remove the existing cover‚ often secured with Velcro or snaps. Ensure the new seat cover is specifically designed for your model – the Medline Rollator Replacement Seat Assembly is a compatible option.
Align the new cover with the seat frame‚ carefully attaching any Velcro straps or snaps. A snug fit ensures comfort and prevents slippage during use. Regularly replacing the cover‚ especially with frequent use‚ helps maintain cleanliness and extends the life of the seat padding.
Inspect the attachment points for wear and tear during replacement.
Replacing Brake Cables
Replacing brake cables ensures your Drive walker’s safety. Begin by disengaging the brake levers. Carefully remove the old cable from the lever and wheel mechanism‚ noting its routing. Install the new cable‚ following the original path precisely.
Securely attach the cable to both the brake lever and the wheel braking system‚ ensuring proper tension. Test the brakes thoroughly after installation; they should engage firmly and release smoothly. The Drive Handlebar Assembly with Brake may be needed if the lever is damaged.
Regular inspection and timely replacement are crucial for reliable braking.

Troubleshooting Common Issues
Common issues include folding problems‚ brake malfunctions‚ and seat instability; addressing these promptly ensures safe and effective use of your Drive walker.
Walker Not Folding Properly
If your Drive walker isn’t folding‚ first ensure all locking mechanisms are disengaged. Check for any obstructions – items in the storage pouch or around the folding hinges can prevent proper collapse. Verify the back support‚ if applicable‚ is fully removed or adjusted correctly for folding.
Sometimes‚ a slight rocking motion while simultaneously pressing the release levers can help initiate the fold. Inspect the folding mechanism for any visible damage or misalignment. If the issue persists‚ consult the assembly instructions or contact Drive Medical customer support for assistance‚ as forcing it could cause damage.
Brakes Not Engaging
If the brakes aren’t engaging on your Drive rollator‚ initially check the brake cables for any visible fraying or disconnection. Ensure the brake levers are fully compressing and that there’s no slack in the cables. Inspect the wheel rims for debris or obstructions that might be hindering brake pad contact.
A Drive Handlebar Assembly with Brake replacement might be necessary if the mechanism is damaged. If adjustments don’t resolve the issue‚ avoid using the walker until the brakes are functioning correctly to ensure safety. Contact customer support for guidance or repair options.
Seat Instability
If the seat feels unstable‚ immediately stop using the walker and carefully inspect the seat’s mounting hardware. Verify all screws and bolts are securely tightened; loose connections are a common cause. A Medline Rollator Replacement Seat Assembly might be required if the existing seat frame is damaged or cracked.
Ensure the seat locking mechanism is functioning correctly‚ providing a firm hold when the seat is in the down position. Regularly check for wear and tear on the seat hinges and supports. Prioritize safety – do not use a walker with a compromised seat.

Replacement Parts and Accessories
Essential replacements include the Medline Rollator Replacement Seat Assembly and Drive Handlebar Assembly with Brake‚ ensuring continued safe and reliable walker operation.
Medline Rollator Replacement Seat Assembly
Replacing a worn or damaged seat is straightforward with the Medline Rollator Replacement Seat Assembly. This assembly‚ specifically designed for models like the MDS86800XW‚ restores a comfortable resting point during use.
Installation typically involves removing the existing seat – often secured with simple fasteners – and attaching the new assembly with included hardware. Ensure a secure fit before use‚ verifying stability and proper alignment.
A new seat enhances the walker’s functionality‚ providing a safe and reliable place to rest when needed. Regularly inspect the seat for wear and tear‚ and replace it promptly to maintain user safety and comfort. This simple upgrade extends the life of your rollator.
Drive Handlebar Assembly with Brake
The Drive Handlebar Assembly with Brake is a crucial component for maintaining control and safety while using your rollator‚ particularly the RTL10266TWHL model. Replacing a damaged or worn assembly ensures reliable braking performance and a secure grip.
Installation involves detaching the old handlebars and attaching the new assembly‚ connecting the brake cables carefully. Proper brake cable tension is vital for effective stopping power.
Regularly inspect the handlebars and brake function for any signs of wear or malfunction. A functioning brake system is paramount for user safety‚ providing confidence and stability during ambulation. This assembly restores those critical features.