
art resin instructions
Resin art is a trendy, creative outlet allowing individuals to express themselves on various surfaces, gaining popularity through platforms like TikTok and Instagram.
This art form offers a unique way to create sparkly, durable, and personalized home décor, making it accessible for all skill levels.
Beginners can easily dive into resin art with simple step-by-step guides, transforming ordinary objects into stunning, resin-coated masterpieces.
What is Resin Art?
Resin art, at its core, involves utilizing epoxy resin – a synthetic material – as the primary medium for creating artistic pieces. This versatile substance, when combined with hardeners and colorants, transforms into a durable, glass-like finish.
Unlike traditional paints or sculpting materials, resin offers a unique depth and clarity, allowing for the encapsulation of objects and the creation of stunning visual effects. It’s a process where creativity meets chemistry, resulting in pieces that are both beautiful and long-lasting.
The art form encompasses a wide range of techniques, from simple coatings to complex layered designs, making it accessible to beginners while offering endless possibilities for experienced artists. It’s about projecting your creativity onto external surfaces, crafting something truly unique and personal.
Essentially, resin art is about transforming liquid plastic into tangible, captivating works of art.
The Popularity of Resin Art (TikTok & Instagram)
Resin art’s surge in popularity is undeniably linked to the visual nature of platforms like TikTok and Instagram. Short-form videos showcasing mesmerizing pours, captivating color combinations, and the satisfying process of bubble removal quickly went viral, captivating a broad audience.
The aesthetic appeal of resin – its glossy finish and ability to embed objects – translates exceptionally well to these visually-driven platforms. Tutorials and time-lapses demystified the process, encouraging viewers to try it themselves.
This trend thrived even after its initial boom, with a continuous stream of new techniques and inspiring creations shared daily. The hashtag #resinart became a hub for inspiration, fostering a vibrant community of artists and enthusiasts. The platforms provided a space for learning, sharing, and showcasing the beauty of resin art.
Materials Needed for Resin Art
Creating resin art requires epoxy resin, hardener, colorants like pigments or mica powders, essential tools, and safety gear for a successful project.

Types of Resin (Epoxy Resin)
Epoxy resin is the most commonly used type for art projects, prized for its clarity, durability, and resistance to yellowing over time. It comes in various formulations, each suited for different applications.
ArtResin is a popular brand specifically designed for coating artwork, offering UV resistance and a self-leveling property. Deep pour resins are formulated to handle thicker layers, ideal for larger castings or river tables, preventing overheating during curing.
Conversely, casting resins are better for embedding objects, offering low viscosity and minimal bubbles. Understanding these distinctions is crucial; selecting the correct resin ensures optimal results and prevents issues like cracking or cloudiness. Always check the manufacturer’s instructions for specific mixing ratios and curing times.
Essential Tools & Supplies
Essential tools for resin art begin with accurate measuring cups and mixing sticks – silicone cups are ideal as resin doesn’t stick. You’ll need a well-ventilated workspace and personal protective equipment like gloves and a mask.
For color, pigments, dyes, and mica powders are popular choices. A heat gun or torch is vital for removing bubbles and creating cell effects. Other helpful supplies include plastic sheeting to protect surfaces, molds (silicone molds are best), and various embedding objects like dried flowers or glitter.
Consider having sandpaper for finishing and polishing, should your project require it. Finally, a level surface is crucial for even resin distribution and a professional finish.
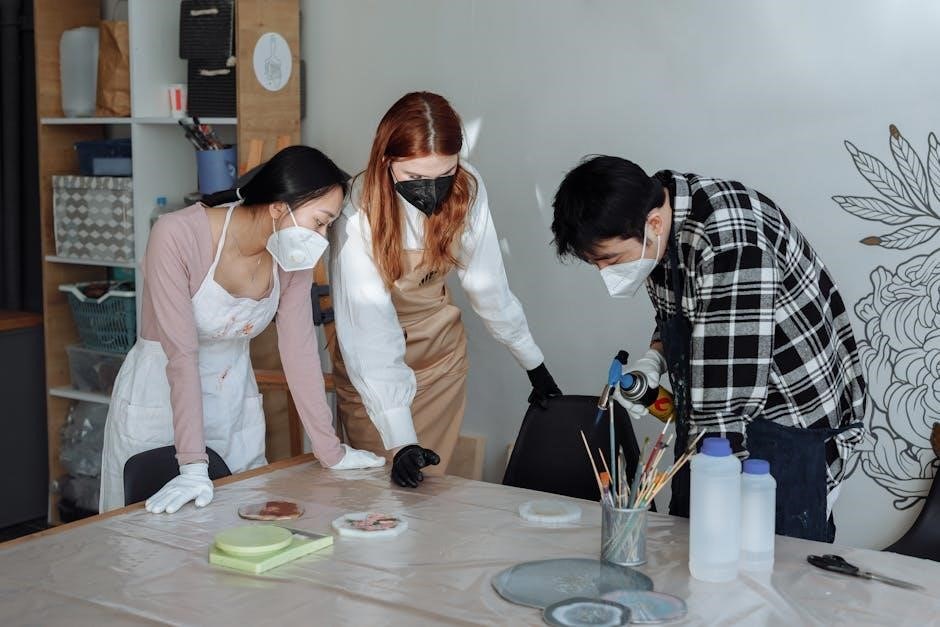
Safety Precautions (Gloves, Masks, Ventilation)
Resin art involves chemicals, so safety is paramount. Always wear gloves – nitrile gloves are recommended – to protect your skin from irritation and allergic reactions. A mask or respirator is crucial to avoid inhaling fumes during mixing and pouring, especially with prolonged use.
Adequate ventilation is non-negotiable. Work in a well-ventilated area, ideally with an open window or a fan to circulate air. Avoid working in enclosed spaces. Read the resin’s Safety Data Sheet (SDS) for specific hazard information.
Keep children and pets away from the workspace. If resin contacts skin, wash immediately with soap and water. Eye protection is also advisable to prevent splashes.

Preparing Your Workspace
Resin art requires a flat, protected surface for pouring. Cover your work area with plastic sheeting to safeguard against spills and ensure easy cleanup.
Choosing a Flat, Protected Surface
Selecting the right workspace is crucial for successful resin art. A perfectly level surface is paramount; even a slight incline can cause the resin to flow unevenly, resulting in an undesirable, asymmetrical finish. Consider using a dedicated table or covering a stable surface with a protective layer.
Avoid porous materials like unfinished wood, as resin can seep into them and create a difficult-to-remove bond. Ideal surfaces include glass, ceramic tile, or a smooth, sealed tabletop. Ensure the chosen area is spacious enough to comfortably accommodate your project and all necessary supplies, allowing for free movement during the pouring and manipulation stages.
Remember, a stable and level foundation is the first step towards achieving professional-looking resin art results.
Protecting Surfaces with Plastic Sheeting
Even with a carefully chosen workspace, protecting surrounding areas with plastic sheeting is absolutely essential when working with resin. Resin is notoriously sticky and can be incredibly difficult to remove once cured, potentially damaging furniture or flooring.
Use heavy-duty plastic drop cloths or painter’s plastic to completely cover the area around your work surface. Extend the plastic several inches beyond the edges of your table or workspace to catch any accidental drips or spills. Secure the plastic with painter’s tape to prevent it from shifting during the pouring process.
This simple precaution will save you significant cleanup time and prevent irreversible damage, ensuring a stress-free and enjoyable resin art experience.

Step-by-Step Resin Art Instructions
Begin your resin journey by setting up a workspace, then meticulously measure and mix equal parts of resin and hardener for optimal results.
Follow each step carefully to achieve stunning, personalized resin creations.
Step 1: Measuring and Mixing Resin & Hardener
Accurate measurement is crucial for successful resin art; most resins require a 1:1 mixing ratio by volume, but always confirm your specific resin’s instructions.
Use separate, graduated mixing cups for both the resin and the hardener to ensure precision. Slowly pour the hardener into the resin, avoiding introducing excessive air bubbles.
Gently stir the mixture with a flat mixing stick for approximately 2-3 minutes, scraping the sides and bottom of the cup to fully incorporate the hardener.
Avoid vigorous stirring, as this will create more bubbles. A slow, deliberate mixing action is key. The mixture should become clear and slightly warm to the touch, indicating proper combination.
Improper mixing can lead to sticky, uncured resin, so take your time and double-check!
Step 2: Adding Colorants (Pigments, Dyes, Mica Powders)
Once the resin and hardener are thoroughly mixed, it’s time to add color! Pigments, dyes, and mica powders are popular choices for creating vibrant resin art.
Start with a small amount of colorant – a little goes a long way. Add it to the resin mixture and gently stir until the color is evenly distributed.
Different colorants offer varying effects; pigments provide opaque color, dyes create translucent shades, and mica powders add shimmer and pearlescence.
Experiment with layering colors or creating gradients for unique visual effects. Remember to record the amounts of colorant used for consistent results in future projects.
Always ensure the colorant is fully dissolved to prevent streaking or uneven coloring in your finished piece.
Step 3: Pouring the Resin
With your resin and colorants perfectly mixed, the exciting part begins: pouring! Carefully pour the resin mixture onto your prepared surface or into your chosen mold.
Pour slowly and steadily to avoid creating excessive bubbles. If you’re layering colors, pour them individually, allowing each layer to partially set before adding the next.
Consider the desired effect – a single pour creates a smooth surface, while multiple pours can build texture and depth. For larger pieces, pour in sections.
Ensure the resin evenly covers the surface, reaching all edges and corners. Use a stir stick or heat gun to gently guide the resin into any difficult-to-reach areas.
Remember to work in a well-ventilated area and wear appropriate safety gear during the pouring process.
Step 4: Manipulating the Resin (Techniques)

Once poured, you can manipulate the resin to achieve unique artistic effects. A heat gun or torch (used cautiously!) can remove bubbles and encourage cell creation, adding mesmerizing patterns.
Gently swirl or tilt the surface to blend colors and create fluid art designs. Use a toothpick or stir stick for more controlled movements, forming intricate patterns.
For dirty pours, layer different colored resins and then tilt the canvas to create flowing, abstract designs. Embedding objects requires careful placement before the resin sets.
Experiment with different techniques to discover your personal style. Remember, practice makes perfect, and each pour is a learning opportunity.
Always prioritize safety when using heat tools and work in a well-ventilated space.
Common Resin Art Techniques
Resin art boasts diverse techniques, including fluid art, dirty pours, and embedding objects, often enhanced with heat tools for bubble removal and cell creation.
Fluid Art & Dirty Pours
Fluid art and dirty pours are incredibly popular resin art techniques, especially for beginners seeking visually striking results. These methods involve layering different colored resins, often without pre-mixing, to create abstract patterns.
A “dirty pour” specifically entails combining various resin colors into a single cup before pouring onto the canvas, resulting in unique cell formations and swirling effects. The key is to experiment with color combinations and pouring methods.
Controlling the flow and interaction of the resins is crucial; tilting the canvas allows the colors to blend and create organic designs. These techniques offer a fantastic introduction to manipulating resin and achieving artistic effects with minimal effort.

Using a Heat Gun or Torch (Bubble Removal & Cell Creation)
Employing a heat gun or torch is essential for refining resin art, primarily for removing air bubbles and enhancing cell creation. Gently sweeping a heat gun across the resin surface encourages bubbles to rise and pop, resulting in a clear, flawless finish.
A torch, used with caution, can create “cells” – those mesmerizing circular patterns within the resin. The heat causes the resin to contract and separate, forming these unique formations.
However, excessive heat can cause discoloration or even damage the resin, so practice moderation and maintain a safe distance. Mastering this technique unlocks a new dimension of visual depth and complexity in your resin art projects.
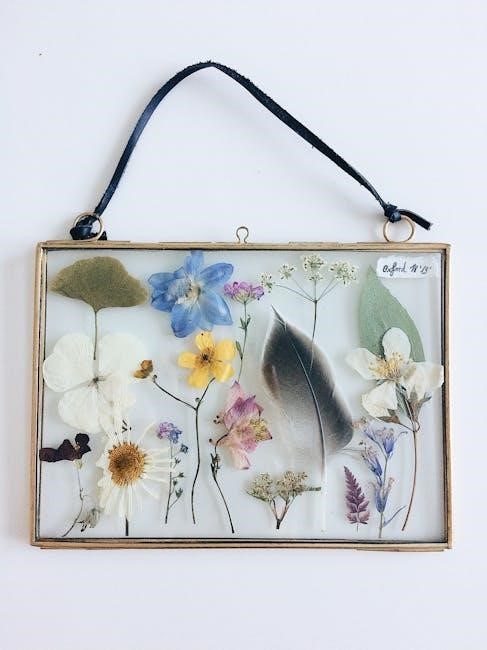
Embedding Objects in Resin
Resin art truly shines when incorporating objects – flowers, photos, shells, or trinkets – within the clear epoxy. Before pouring, ensure embedded items are completely dry to prevent cloudiness or reactions with the resin.
Carefully position objects onto your prepared surface, considering their desired placement and orientation. A slow, controlled pour of resin around and over the objects is crucial, avoiding displacement.
For larger or heavier items, a partial pour, allowing it to set slightly, then a second pour to fully encapsulate, is recommended. This prevents sinking. Protect delicate items with a thin resin coat first for added security and clarity.
Troubleshooting Common Resin Art Problems
Resin art can present challenges like bubbles, stickiness, or cloudiness; however, these issues are often avoidable with proper technique and understanding of the process.
Dealing with Bubbles
Bubbles are a common frustration for beginners in resin art, but thankfully, several methods exist to minimize or eliminate them. Initially, gently stir the resin and hardener together, avoiding vigorous mixing that introduces air.
After pouring, a quick pass with a heat gun or torch (held several inches away!) can effectively release trapped bubbles by reducing the resin’s surface tension. Be cautious not to overheat, as this can cause other issues.
Allowing the resin to sit for a few minutes after mixing also helps bubbles rise to the surface. For smaller projects, a toothpick can be used to pop individual bubbles. Remember, a few tiny bubbles are often unavoidable and won’t significantly detract from the finished piece!
Addressing Sticky or Cloudy Resin
Sticky resin usually indicates an improper resin-to-hardener ratio or insufficient mixing. Ensure precise measurements and thoroughly combine the components, scraping the sides and bottom of the mixing container; If stickiness persists, gentle warmth can sometimes help complete the curing process, but avoid excessive heat.
Cloudy resin often results from high humidity during mixing or curing, or from moisture contamination. Work in a dry environment and ensure all tools and surfaces are completely dry.
Sanding and polishing can often restore clarity to cloudy resin, but prevention is key. Properly mixed and cured resin should be crystal clear, showcasing your embedded elements beautifully.
Preventing Warping and Cracking
Warping in resin art, particularly with wood substrates, often stems from uneven resin distribution or rapid temperature changes during curing. Apply resin in consistent, moderate layers, allowing each layer to partially cure before adding the next. This minimizes stress on the base material.
Cracking can occur due to excessive heat, rapid cooling, or using an incompatible base material. Avoid direct sunlight or heat sources during curing. Ensure your substrate is suitable for resin – porous materials may require sealing.
Proper preparation and controlled curing conditions are vital for a durable, crack-free finish. Thin layers and gradual temperature changes are your allies!
Finishing and Curing Your Resin Art
Curing requires patience! Allow ample time for complete hardening, typically 24-72 hours, in a dust-free environment. Sanding and polishing refine the surface.
Sanding and Polishing (If Necessary)
Sanding becomes essential if your cured resin piece exhibits imperfections like rough edges, small bubbles near the surface, or an uneven finish. Begin with a coarser grit sandpaper – around 220 – to address significant flaws, gradually progressing to finer grits like 400, 600, and even 800 for a flawlessly smooth surface.
Always wet-sand to prevent dust and heat buildup, which can damage the resin. After sanding, thoroughly clean the piece to remove any sanding residue.
Polishing elevates the shine and clarity of your resin art; Utilize a polishing compound specifically designed for resin, applying it with a soft cloth or polishing wheel. This step restores a brilliant, glass-like appearance, enhancing the overall aesthetic appeal of your finished artwork.
Curing Time and Conditions
Curing is the crucial process where resin transitions from a liquid to a solid state, achieving maximum hardness and durability. Typically, epoxy resin requires approximately 24 to 72 hours for a full cure, though this timeframe can vary based on resin type, ambient temperature, and humidity levels.
Maintain a consistent temperature between 70-75°F (21-24°C) for optimal curing. Avoid direct sunlight or drastic temperature fluctuations, as these can cause issues like cloudiness or cracking.
While the resin may feel dry to the touch within 24 hours, allow the full curing period to ensure complete hardening. Patience during this phase is key to a long-lasting, beautiful resin art piece.