
nikon d5200 user manual
Welcome! This manual guides you through the Nikon D5200’s features, ensuring optimal use of this single-lens reflex digital camera for stunning photography.
This comprehensive guide will help you understand and successfully operate your newly integrated Nikon D5200, maximizing its potential.
What’s in the Box
Upon unboxing your Nikon D5200, you should find several essential components to begin your photographic journey. These include the D5200 digital camera body itself, a versatile kit lens – typically an 18-55mm or similar – allowing for a range of shooting scenarios.
You’ll also receive a rechargeable EN-EL14 battery to power your camera, and a dedicated MH-24 charger for replenishing its power. A comprehensive user manual is included, providing detailed instructions and guidance. Further accessories consist of a USB cable for data transfer and charging, a video cable for connecting to a TV, and a strap for secure camera handling.
Additionally, you’ll find body cap, lens cap, and various documentation like warranty information. Verify all items are present for a complete setup!
Key Features of the D5200
The Nikon D5200 boasts a remarkable 24.2-megapixel DX-format CMOS sensor, delivering exceptional image quality and detail. Its EXPEED 3 image processing engine enhances performance and reduces noise, even in low-light conditions. A 3.0-inch tilting LCD screen provides flexible viewing angles, simplifying composition and review.
This camera features a robust 39-point autofocus system, ensuring sharp and accurate focus on your subjects. Full HD 1080p video recording capabilities allow you to capture stunning movies with ease. The D5200 also incorporates creative effects modes, adding artistic flair to your photos and videos.
Built-in Wi-Fi connectivity enables seamless image sharing and remote camera control via a compatible smartphone or tablet.

Getting Started
Begin your photographic journey! This section details essential steps – charging, battery insertion, and lens attachment – to quickly prepare your Nikon D5200.
Charging the Battery
Ensuring Power: Before first use, fully charge the EN-EL14 battery. Locate the DC IN jack on the camera’s side. Connect the supplied AC adapter and power cord.
The charging indicator lamp illuminates red while charging. Once fully charged, the lamp turns off. A full charge typically takes approximately 2 hours.
Important Notes: Only use the Nikon-supplied AC adapter (EP-5B) to avoid damage. Do not use the camera while the battery is charging. The battery can be charged even when the camera is turned off.
For optimal battery life, store the battery in a cool, dry place. Avoid extreme temperatures. Regularly cycling the battery (charging and discharging) helps maintain its performance over time.
Inserting the Battery
Powering Up: Locate the battery compartment door on the bottom of the camera. Slide the latch to unlock and open the door. Insert the EN-EL14 battery, ensuring the contacts align correctly with those inside the compartment.
Press the battery firmly until it clicks into place. To secure the battery, slide the compartment door closed until the latch clicks, preventing accidental ejection.
Safety First: Always use a Nikon-approved EN-EL14 battery. Incorrect battery insertion can damage the camera. Do not force the battery into the compartment.
If the camera does not power on, double-check the battery insertion and ensure it’s fully charged. Regularly inspect the battery contacts for any debris or corrosion.
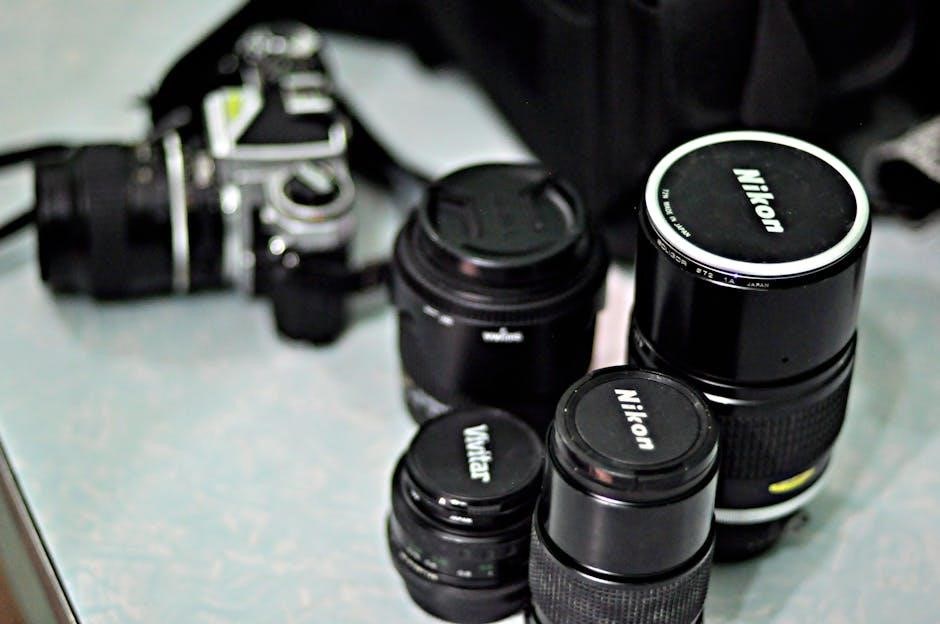
Attaching a Lens
Secure Connection: Align the lens mounting index (the dot or rectangle) on the lens with the corresponding mark on the camera body. Gently push the lens into the mount and turn it clockwise until it clicks into place.
Confirm Attachment: Ensure the lens is securely locked by gently attempting to rotate it counter-clockwise. It should not move. To remove the lens, press the lens release button on the camera body and turn the lens counter-clockwise.
Handling Precautions: Avoid touching the lens contacts. Always hold the lens by its barrel, not the extending parts. Store lenses with the rear cap on to protect the glass.

Understanding the Camera Interface
Explore the controls! Familiarize yourself with the mode dial, buttons, dials, and LCD screen for seamless navigation and optimal camera operation.
The Mode Dial
The Mode Dial is your primary control for selecting shooting modes. Located on the top right of the camera, it allows quick access to various settings tailored for different photographic scenarios.
Key modes include Auto, for fully automatic operation, ideal for beginners. Program (P) offers some control over settings while maintaining automatic exposure. Aperture-Priority (A or Av) lets you set the aperture for depth of field control, while the camera adjusts shutter speed. Shutter-Priority (S or Tv) allows you to control shutter speed for motion blur or freezing action, with the camera adjusting aperture.
Manual (M) provides complete control over both aperture and shutter speed. Additional modes include Scene modes for specific situations and Effects for creative filters. Understanding each mode unlocks the D5200’s full potential, allowing you to capture images precisely as envisioned.
Control Buttons and Dials
The Nikon D5200 features several buttons and dials for intuitive control. The directional pad navigates menus and selects focus points. The OK button confirms selections, while the Info button toggles display information on the LCD screen.
Dials control aperture, shutter speed, and exposure compensation, depending on the selected shooting mode. The Fn button provides quick access to frequently used settings. The Live View button activates Live View shooting.
Understanding the function of each button and dial is crucial for efficient operation. Experimenting with these controls allows for rapid adjustments and personalized camera settings. Mastering these elements enhances your shooting experience and unlocks creative possibilities within the D5200’s interface.
The LCD Screen and Menu System
The Nikon D5200’s 3.0-inch LCD screen serves as your primary interface for reviewing images, navigating menus, and adjusting camera settings. The screen displays shooting information, playback options, and a live view of your composition.
The menu system is organized into several tabs: Shooting Menu, Playback Menu, Setup Menu, and Custom Settings. Each menu contains a range of options for customizing the camera to your preferences. Use the directional pad to navigate and the OK button to select.
Familiarizing yourself with the menu structure is key to unlocking the D5200’s full potential. Explore the options to personalize image quality, autofocus, and other essential settings.
Shooting Basics
Master fundamental techniques! Learn focusing modes, exposure settings (Auto, Program, Aperture-Priority, Shutter-Priority, Manual), ISO, and white balance for optimal results.
Focusing Modes
Understanding your D5200’s focusing options is crucial for sharp, clear images; The Nikon D5200 offers several focusing modes to suit various shooting situations. Single-servo AF (AF-S) is ideal for stationary subjects; the camera focuses once when you half-press the shutter button.
Continuous-servo AF (AF-C) tracks moving subjects, continuously adjusting focus as they move – perfect for action shots. Automatic-servo AF (AF-A) automatically switches between AF-S and AF-C, attempting to determine the best mode for the scene.
Focus Area Modes determine where the camera focuses. Single-point AF lets you select a specific focus point, while Dynamic-area AF uses surrounding points to help track moving subjects. Auto-area AF allows the camera to automatically select focus points, and 3D-tracking maintains focus on a moving subject as it travels across the frame.
Exposure Modes (Auto, Program, Aperture-Priority, Shutter-Priority, Manual)
The Nikon D5200 offers five primary exposure modes, granting varying levels of control over your images. Auto mode simplifies shooting, letting the camera handle all settings. Program mode (P) allows some control, like ISO and white balance, while the camera sets aperture and shutter speed.
Aperture-priority (A or Av) lets you choose the aperture (f-stop), influencing depth of field, while the camera selects the shutter speed. Shutter-priority (S or Tv) allows you to set the shutter speed, controlling motion blur, with the camera adjusting the aperture.
Manual mode (M) provides full control over both aperture and shutter speed, offering maximum creative flexibility. Understanding these modes empowers you to achieve your desired photographic results, adapting to diverse lighting conditions and artistic visions.
ISO Settings
ISO sensitivity determines your camera’s sensitivity to light. Lower ISO settings (like 100 or 200) are ideal for bright conditions, producing cleaner images with minimal noise. As light decreases, increasing the ISO (e.g., 400, 800, 1600, or higher) allows for faster shutter speeds or smaller apertures.
However, higher ISO values introduce more noise (grain) into your images. The Nikon D5200’s ISO range allows flexibility, but balancing sensitivity with image quality is crucial. Experiment to find the highest usable ISO for your specific needs, considering the trade-off between brightness and noise levels.
Auto ISO is a convenient option, letting the camera automatically adjust ISO based on shooting conditions, but manual control offers greater precision.
White Balance Settings
White balance (WB) corrects color casts caused by different lighting conditions, ensuring accurate color reproduction. The Nikon D5200 offers several WB presets, including Auto, Incandescent, Fluorescent, Direct Sunlight, Cloudy, and Shade. Auto WB generally performs well, but can sometimes be inaccurate.
For precise control, use the preset modes corresponding to your light source. Custom WB allows you to manually set white balance using a white or gray card for ultimate accuracy. Understanding WB is vital for achieving natural-looking colors in your photos.
Experiment with different settings to see how they affect your images, especially in challenging lighting situations. Incorrect WB can result in images appearing too warm (yellowish) or too cool (bluish).

Advanced Shooting Techniques
Explore creative possibilities! Master Live View for precise composition, capture stunning movies, and understand metering modes for perfectly exposed, professional-quality photographs.
Using Live View
Live View offers a unique shooting experience, displaying the image directly on the LCD screen. To activate it, simply switch the Mode Dial to ‘Live View’ mode. This allows for precise composition and focusing, especially useful when using a tripod or shooting from awkward angles.
Within Live View, you can utilize various focusing methods, including Autofocus and Manual Focus. Autofocus can be set to single-servo (AF-S) or continuous-servo (AF-C) depending on your subject’s movement. Experiment with different focus area modes for optimal results.
Furthermore, Live View provides access to helpful features like grid display and virtual horizon, aiding in achieving perfectly level and balanced compositions; Remember that prolonged Live View usage can impact battery life and potentially cause the camera to warm up.
Shooting Movies
The Nikon D5200 allows you to capture high-definition videos with ease. To begin, rotate the Mode Dial to ‘Movie’ mode. Press the shutter button to start and stop recording. You can select various movie settings, including resolution (1080p, 720p) and frame rate (24fps, 30fps) within the shooting menu.
When ‘On’ is selected for Movie settings, manual movie settings become available in the shooting menu, granting greater control over exposure and audio. Ensure a compatible SD card with sufficient storage is inserted before recording.
During movie recording, autofocus operates continuously. Be mindful of battery life, as video recording consumes power rapidly. External microphones can be connected for improved audio quality.
Understanding Metering Modes
The Nikon D5200 offers several metering modes to help achieve accurate exposure. Matrix metering evaluates the entire scene for balanced exposure, ideal for general photography. Center-weighted metering prioritizes the center of the frame, useful for portraits where the subject is centrally located.
Spot metering measures light from a very small area, perfect for challenging lighting situations or when precise exposure of a specific subject is needed. To change metering modes, access the shooting menu. Understanding these modes allows you to tailor exposure to your specific scene and creative vision.
Experiment with each mode to see how they affect your images in different lighting conditions, leading to better control and more consistent results.
Menu Navigation and Customization
Explore! The D5200’s menu system allows extensive customization of settings, including control buttons and shooting preferences, for a personalized experience.
Customizing the Control Buttons
Personalize your workflow! The Nikon D5200 offers a degree of customization for its control buttons, allowing you to assign frequently used functions for quicker access during shooting. This feature streamlines your photographic process, reducing the need to navigate through menus repeatedly.
Access the “Customizing Control Buttons” option within the Setup Menu. Here, you can select specific buttons – such as the ‘fn’ button – and assign them to various operations. These can include adjusting ISO, white balance, focus mode, or activating Live View.
Experiment with different configurations to find what best suits your shooting style. Remember to consider the functions you use most often and assign them to easily reachable buttons. This customization significantly enhances the camera’s usability and responsiveness, making it a truly tailored photographic tool.
Setting Up the Shooting Menu
Fine-tune your image capture! The Shooting Menu is central to controlling the D5200’s core photographic settings. Within this menu, you’ll find options to adjust image quality, size, and format (RAW or JPEG). Explore settings for Auto ISO, metering, and Active D-Lighting, which optimizes dynamic range.
Navigate through categories like ‘Focus’, ‘Metering’, ‘ISO’, and ‘White Balance’ to tailor the camera to your specific shooting conditions. You can also configure movie settings, including resolution, frame rate, and microphone sensitivity.
Understanding each option allows for precise control over your images. Don’t hesitate to experiment with different settings to see how they affect the final result. Careful setup of the Shooting Menu is crucial for achieving your desired photographic style and quality.
Setting Up the Setup Menu
Customize your D5200 experience! The Setup Menu handles the camera’s general settings, impacting its operation and personalization. Here, you can adjust the date, time, and world time for accurate timestamps. Configure display settings like brightness, LCD color balance, and viewfinder display information.
Explore options for customizing buttons and controls, assigning functions to suit your shooting style. Manage audio settings, including beep sounds and microphone levels. Crucially, this menu allows for sensor cleaning settings and firmware version checks.
Language selection, image comment input, and slot management are also found here. Thoroughly reviewing the Setup Menu ensures the camera functions optimally and aligns with your preferences.
Troubleshooting Common Issues
Don’t panic! This section addresses typical problems like the camera failing to power on, focusing difficulties, or subpar image quality—find quick solutions here.
Camera Not Turning On
Problem: Your Nikon D5200 won’t power on, preventing you from capturing those precious moments. Let’s troubleshoot!
First Steps: Ensure the battery is correctly inserted and fully charged. A depleted battery is the most common culprit. Try a different, known-good battery if available. Verify the battery contacts within the camera compartment are clean and free of corrosion.
Check the Power Switch: Confirm the power switch is set to the “ON” position. Sometimes, it can be accidentally nudged off. Also, inspect the battery compartment latch; it must be securely closed for the camera to function.
Memory Card Issue?: In rare cases, a faulty memory card can prevent the camera from starting. Remove the memory card and attempt to power on the camera. If it works, the card may be the issue.
If all else fails: Consult Nikon’s support website or contact their customer service for further assistance.
Focusing Problems
Issue: Your Nikon D5200 struggles to achieve sharp focus, resulting in blurry images. Let’s diagnose and resolve this!
Focus Mode: Verify you’ve selected the appropriate focus mode (AF-S, AF-C, or Manual). AF-S is ideal for stationary subjects, while AF-C tracks moving objects. Ensure the focus mode is suited to your scene.
Focus Area Mode: Experiment with different focus area modes (Single-point, Dynamic-area, Auto-area). Single-point offers precise control, while Dynamic-area is better for tracking moving subjects.
Sufficient Light?: Low light conditions can hinder autofocus performance. Try increasing the ISO or using an external light source. Ensure your subject is within the camera’s focusing range.
Lens Cleanliness: A dirty lens can affect focusing accuracy. Clean the lens with a microfiber cloth; If problems persist, consider professional lens cleaning.
Image Quality Issues
Problem: Your Nikon D5200 images appear noisy, lack detail, or have inaccurate colors. Let’s troubleshoot these common image quality concerns.
ISO Settings: High ISO settings increase image noise. Lower the ISO whenever possible for cleaner images. Understand the trade-off between brightness and noise.
Image Size & Quality: Ensure you’re shooting in a high-resolution format (RAW or Large JPEG) for maximum detail. Lower quality settings compress images, reducing detail.
White Balance: Incorrect white balance leads to color casts. Select the appropriate white balance preset or use custom white balance for accurate colors.
Sharpness & Contrast: Adjust sharpness and contrast settings in the camera menu or during post-processing to enhance image detail and clarity.
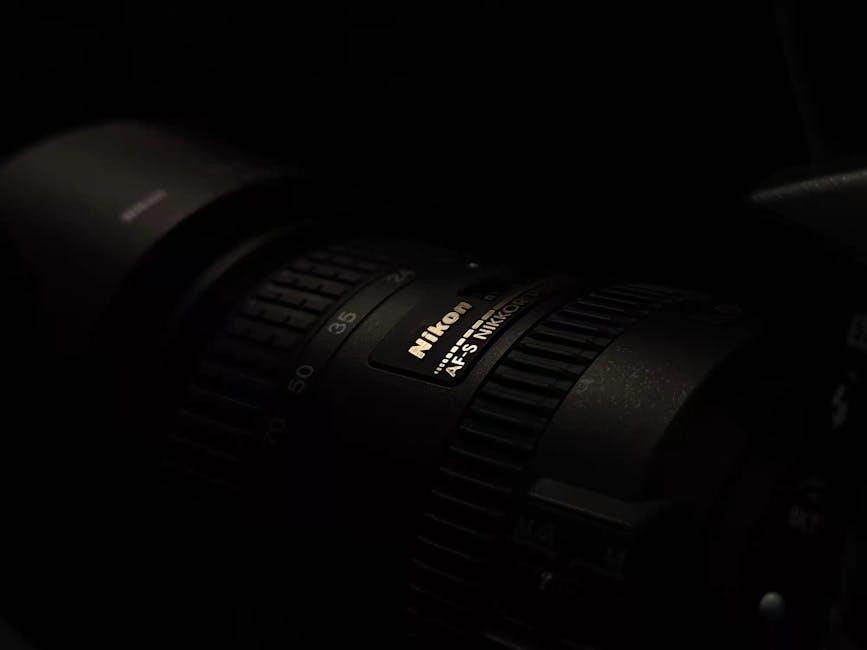
Lens Quality: The lens significantly impacts image quality. A higher-quality lens will generally produce sharper, clearer images.

Maintenance and Care
Protect your investment! Regularly clean the sensor, store the camera properly, and keep the firmware updated for optimal performance and longevity.
Cleaning the Sensor
Maintaining a pristine sensor is crucial for image quality. Dust accumulation can lead to unwanted spots in your photographs. The Nikon D5200 has a built-in sensor cleaning function; utilize this regularly via the setup menu.
For persistent dust, manual cleaning may be necessary. Always exercise extreme caution! Use a dedicated sensor cleaning kit – blower, swabs, and cleaning solution specifically designed for camera sensors.
Never use compressed air cans, as they can damage the sensor. Gently blow away loose particles with the blower. If swabs are needed, follow the kit’s instructions precisely, using a fresh swab for each pass. Improper cleaning can cause irreversible damage, so if you’re uncomfortable, seek professional cleaning services.
Storing the Camera
Proper storage safeguards your Nikon D5200 from damage and ensures longevity. When not in use for extended periods, remove the battery to prevent potential corrosion from leakage. Avoid storing the camera in direct sunlight, extreme temperatures, or high humidity.
Ideally, store the D5200 in a cool, dry, and well-ventilated location. A dedicated camera bag offers excellent protection against dust, bumps, and scratches. Consider using a desiccant pack inside the bag to absorb moisture, especially in humid climates.
Detach the lens and store it separately in a padded case. Regularly check the storage location for any signs of mold or mildew. Careful storage preserves your investment for years of photographic enjoyment.
Firmware Updates
Keeping your Nikon D5200’s firmware updated is crucial for optimal performance and compatibility. Nikon periodically releases firmware updates to improve camera functions, fix bugs, and enhance overall stability. These updates are typically available for free download from the Nikon website.
To check for updates, visit Nikon’s support page and enter your camera model. Follow the instructions carefully to download and install the latest firmware. Important: Ensure the battery is fully charged and do not interrupt the update process.
Incorrectly installing firmware can render your camera unusable. Always read the accompanying documentation and follow the steps precisely. Regular updates ensure your D5200 benefits from the latest advancements.